Hey guys, hope you are all liking my blogs and tutorials! Tut tut you lot, I'm still waiting for pictures! :) So today I'm going to show you how to do the comic strip nails. These are fab, so easy to do and really eye catching! So why not follow these steps and give them a go this weekend . . .

These are just 3 random nails of mine as I go through fazes of liking my nails all unique. It just shows you how diverse nail art can be, you can either do every nail the same, every nail different or every nail the same bar one. If you do decide to go for the last option then I'd say pick the nail art for your ring finger (the one beside the pinky).

Now I'm going to show you the nail art on just one finger but the steps apply to any nail you want to do, just change up the colours of polishes you use and what you want to write.
what you will need . . .
- a base coat
- a bright coloured polish
- a white nail art pen
- a black nail art pen
- a top coat

This is the white nail art pen I use, I also use the black in the same brand.
step one
File and shape your nails (if needed) and ensure your nails are clean, no oils or polish. Apply a base coat to your nails as bright colours can stain your nail. *Remember always make sure each layer of polish completely dries.*
step two
Pick your bright coloured polish and apply one or two coats depending on the shade you want and how well the polish goes on.

This is nails inc kensington park road (for link see end of blog) with one coat, you may need two but I find I only need one as when I have the acrylics on my nails.
step three
Using your white nail art pen you want to draw a zigzag shape, either at the tip or base of your nail and then fill it in. You can either use the pointy bit of the pen or the brush, it's your own preference.

I used a little too much of the white here, as you can see it looks a bit thick and claggy looking. It took forever to dry due to this!
step four
Whilst you are waiting for your white filled zigzag to dry you can add some dots to the rest of the nail. I used the nail art pen again but as you can see from the pictures at the beginning of the blog I did paint one red with yellow dots. You can pick whatever colour you want and if you don't have a nail art pen in the colour you want to use you can just use the kebab/cocktail stick. (see http://www.blogger.com/blogger.g?blogID=7926081553613185029#editor/target=post;postID=5347760447589870587 for how to do this).

step five
Once the white has completely set and dried it is time to add the black outline and any comic style words or symbols you want to use.

Outlining your white zigzag really makes it pop, I outlined mine with the pointed tip of the black nail art pen as I feel you have more control with the pointed tip for smaller, more detailed things.
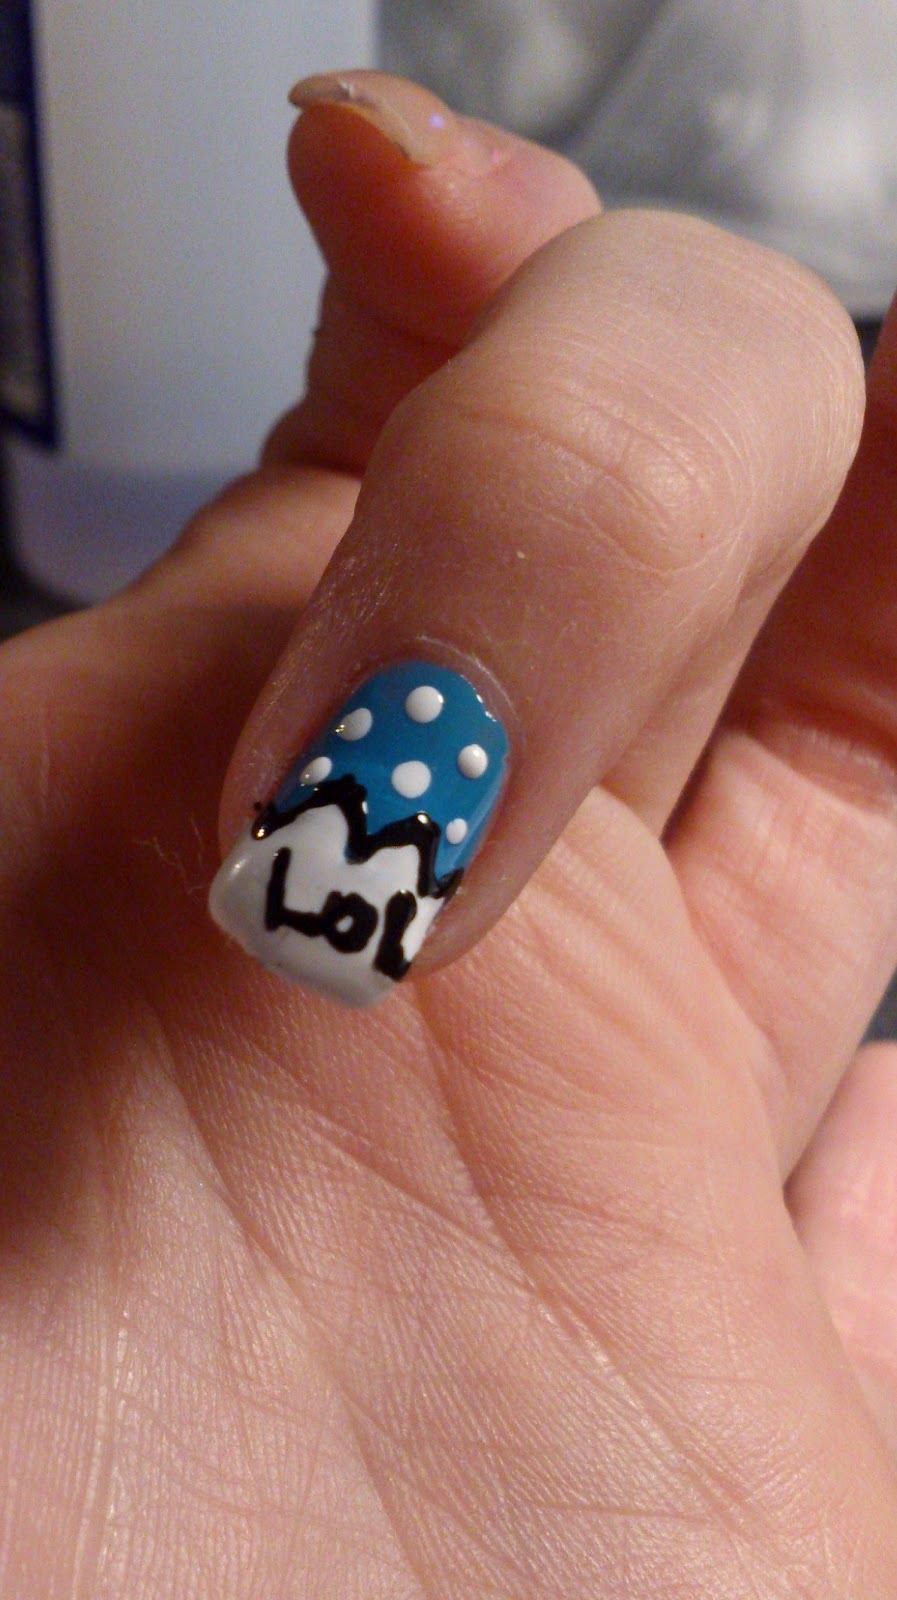
I picked 'lol' for this tutorial as it is pretty simple to write, but you can always practise different ideas on a piece of paper before you write it on your nails.
step five
This is the final step and I'm sure you've guessed it, time for the top coat. I used the nails inc kensington caviar topcoat.

Links to the polishes used in this tutorial . . .
- kensington caviar top and base coat http://www.nailsinc.com/nailpolish/kensington-caviar-top-base-coat-duo/822/ (these can be bought separately)
- kensington park road http://www.nailsinc.com/nailpolish/kensington-park-road-polish/1106/
- white nail art pen and black nail art pen - unfortunately I couldn't find a link for the products I used, but I bought them in my local Claires Accessories for roughly £5 each.
THIS IS MY FACEBOOK FAN PAGE, FEEL FREE TO LEAVE ME ANY COMMENTS/SUGGESTIONS ON MY BLOG OR WHAT YOU'D LIKE ME TO DO. OH AND UPLOAD SOME OF YOUR PICTURES FOLLOWING THE TUTORIALS I'D LOVE TO SEE THEM ALL! :D https://www.facebook.com/pages/DIY-NAIL-ART/321393224615432?cropsuccess
Zane xx
No comments:
Post a Comment